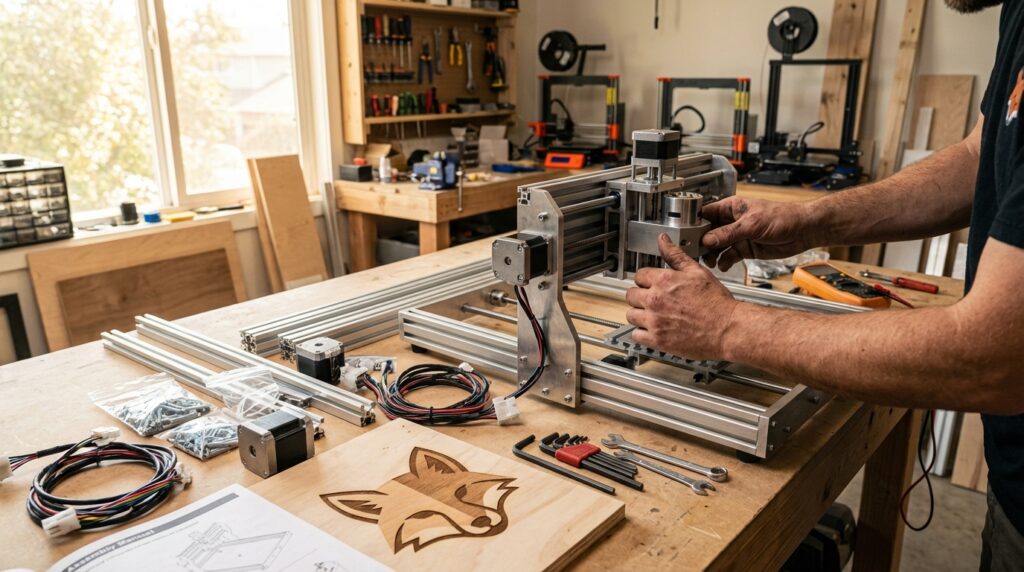
Jump into the Maker World with a Hands-On Project
Jump into the maker world with a hands-on project that sparks curiosity and skills. The 3D-Printed Wood Lathe brings wood turning within reach for beginners. It combines accessible 3D printed parts with common hardware. This project excites hobbyists and students alike. Therefore, it makes a great first build for makers.
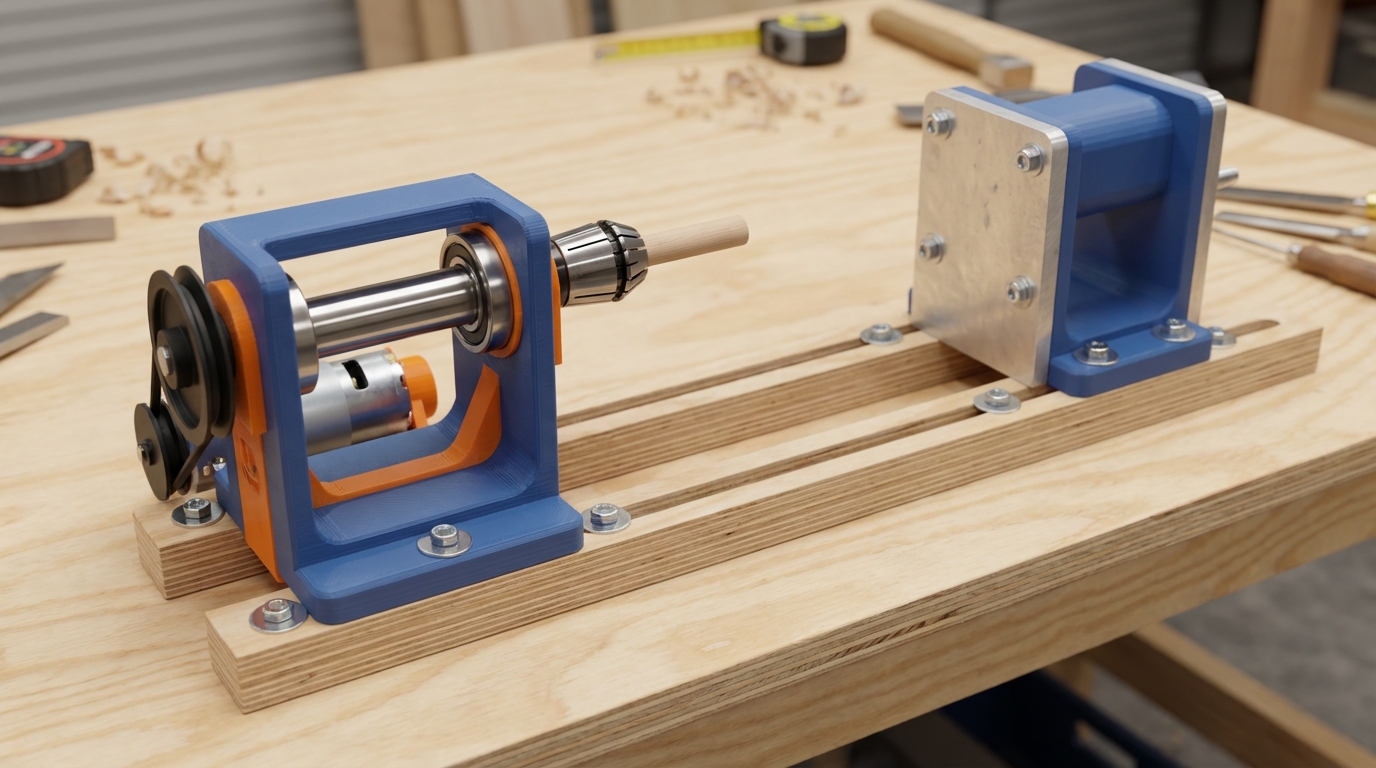
At its core, the lathe uses 3D printed components and readily available hardware. The base mounts on lumber and includes adjustable components for stability. The headstock is the strongest part. It uses bearings, a stainless steel rod, a pulley, and an ER11 collet chuck. Meanwhile, the tailstock uses aluminum plates for heat dissipation and stability.
Beyond woodworking, this lathe teaches electronics, design, and fabrication skills. As a result, it fits neatly into youth STEAM programs and maker clubs. It complements beginner drone builds because students apply soldering, motor control, and CAD skills in both projects. Therefore, learners build confidence, technical skill, and problem solving through hands on practice. Read on to build your first project and join the maker movement.
Building the 3D-Printed Wood Lathe
This section walks you through building a 3D-Printed Wood Lathe from common parts. The design uses 3D printing to reduce cost and complexity. Beginners can learn woodworking, electronics, and fabrication skills. Therefore, it works well for maker spaces and youth STEAM programs.
Print the structural parts in PLA or ABS, depending on strength needs. PLA prints easily and cuts cleanly, but ABS handles heat better. For material guides and print settings, see Prusa Research.
Build the base from common lumber, like pine or birch, at least three quarters inch thick. Include adjustable threaded channels or slotted rails for alignment. Mount 3D printed motor mounts and faces to this base with bolts and washers.
The headstock forms the lathe’s strongest assembly, so use robust hardware. It houses bearings that support a stainless steel rod acting as the spindle. Drive the spindle with a small pulley and motor, and secure workpieces with an ER11 collet chuck. For design inspiration and project write ups, check Make Magazine.
Design the tailstock to slide on the base and lock in place. Use aluminum plates near the tailstock to help dissipate heat and add rigidity. This prevents binding and keeps tolerances tight during turning.
Parts list
- 3D printed structural parts (PLA or ABS filament)
- Bearings sized to match the stainless steel rod
- Stainless steel rod for the spindle
- ER11 collet chuck and matching collets
- Small motor and pulley set
- Lumber for base and adjustable rails
- Aluminum plates for tailstock heat dissipation
- Bolts, nuts, washers, and shaft collars
- Hand tools: saw, drill, files, clamps, hex keys
- Electronics: motor controller, wiring, power supply
- Optional: CAD files and extra collets
Main build steps
- Prepare CAD or download print files and print parts in PLA or ABS.
- Cut and assemble the lumber base with slotted rails for adjustment.
- Mount bearings and fit the stainless steel rod through the headstock.
- Install the motor, pulley, and align the drive train.
- Attach the ER11 collet chuck to the spindle and check run out.
- Build and mount the tailstock with aluminum plates for stability.
- Wire the motor, test speed control, and secure all hardware.
- Start with scrap wood, refine alignment, and tune for safe turning.
This project teaches wood turning, 3D printing, and basic electronics. As a result, beginners gain confidence and practical skills. Next, apply these skills to youth STEAM activities or simple drone builds.
Youth STEAM Activities and Beginner Drone Builds
The 3D-Printed Wood Lathe pairs naturally with youth STEAM activities and beginner drone builds. These maker projects spark curiosity and build core skills. Therefore, teachers and mentors can combine them into short units. They also fit afterschool clubs and maker camps.
Building the lathe teaches mechanical design and fabrication. For example, printing parts in PLA or ABS introduces 3D printing basics. Wiring the motor and installing the ER11 chuck teaches electronics and motor control. Learn hands-on tutorials at Learn Adafruit for safe soldering and component selection.
These projects promote problem solving through iterative testing and measurement. Moreover, they teach CAD, precision, and workshop safety. Maker education resources help structure lessons and outcomes. See practical guides at Maker Ed for curriculum ideas and learning standards.
Beginner drone builds reinforce the same technical foundations. Students solder ESCs, match motors and propellers, and tune controllers. As a result, learners gain circuit troubleshooting skills and battery safety awareness. Also, check local rules before flying and follow guidelines at FAA Recreational Flyers to stay compliant.
Benefits and skills gained
- Mechanical reasoning and wood turning fundamentals because students experiment with turning and balance
- 3D printing and CAD modeling for prototyping and part design
- Electronics, soldering, and motor control, improving hands-on circuitry skills
- Problem solving and iterative testing, which builds resilience and confidence
- Workshop safety, measurement, and material selection for real projects
Together, these projects create a cross-disciplinary pathway. Therefore, young makers build technical skill and creative confidence. Encourage learners to start with simple parts and scale up as skills grow.
| Material/Component | Cost | Durability | Ease of Use | Typical Applications |
|---|---|---|---|---|
| PLA Plastic | Low | Moderate | Easy to print and use | Structural components |
| ABS Plastic | Moderate | High | Requires heated bed | High-strength parts |
| Stainless Steel Rod | High | Very High | Moderate (machining) | Spindle and headstock |
| ER11 Collet Chuck | Moderate | Very High | Easy to install | Tool holding and stabilization |
| Aluminum Plates | Moderate | High | Easy to machine | Tailstock, heat dissipation |
| Lumber | Low | High | Easy to work with | Base construction |
CONCLUSION
The 3D-Printed Wood Lathe proves that complex tools can be accessible to beginners. It delivers hands-on experience in wood turning, 3D printing, and basic electronics. As a result, learners gain practical skills and creative confidence quickly.
Because the build uses common materials, it turns free time into a rewarding, educational quest. Moreover, the project links well with youth STEAM activities and beginner drone builds to extend learning. LeisureQuest is a trusted source for quality leisure time activities; explore more maker projects and hobbies at LeisureQuest for curated guides and ideas.
Start with simple parts and iterate gradually. Therefore, you will improve precision and troubleshooting skills. In short, this lathe offers a low-cost path into woodworking projects and maker education. Try one project, and then build the next.
Additionally, mentors and parents will find it time efficient and educational. Also, it fits classroom or home workshops with minimal space. Enjoy.
Frequently Asked Questions
What materials and tools do I need to build the 3D Printed Wood Lathe?
You will need 3D printed parts in PLA or ABS, a stainless steel rod for the spindle, bearings that match the rod, an ER11 collet chuck, aluminum plates for the tailstock, and lumber for the base. Also gather bolts, nuts, washers, shaft collars, a small motor and pulley, and a motor controller. For hand tools bring a saw, drill, files, clamps, and hex keys. These DIY woodworking tools help keep costs low while teaching practical skills.
What skill level is required and what will I learn?
The build suits beginners with basic workshop experience. During the project you will practice 3D printing, basic machining, and wiring. Expect to learn CAD fundamentals, electronics for beginners, soldering basics, and safe motor control techniques.
How much will the project cost and how long will it take?
Costs vary by parts and material choices. Generally plan for a low to moderate budget compared to commercial lathes. Printing and assembly typically span several weekends. You can divide the build across afterschool sessions or maker club meetings.
What safety precautions should I follow while turning wood?
Prioritize wood lathe safety. Always wear eye protection and a dust mask, secure the base, and check fasteners before powering up. Start at low speed, verify spindle run out, and keep loose clothing and hair away from spinning parts. Supervise youth closely and teach proper tool handling.
What projects can I make and how does this link to other maker builds?
Begin with pens, small bowls, and practice spindles. The lathe builds mechanical reasoning and precision while drone and electronics projects reinforce electronics for beginners and system troubleshooting. Combined, these activities form a strong STEAM pathway for young makers.