Home Internet Optimization: Hands-on Projects for Faster, Cleaner Home Networks
Home Internet Optimization starts with the cables under your floors and the layout of your router. If you want steady video calls, faster file transfers, and fewer dropouts, a few hands-on projects can make the difference. This guide focuses on practical DIY work you can do: planning cable runs, choosing the right Ethernet cable, and organizing networking hardware so your home infrastructure delivers better bandwidth speed and reliability.
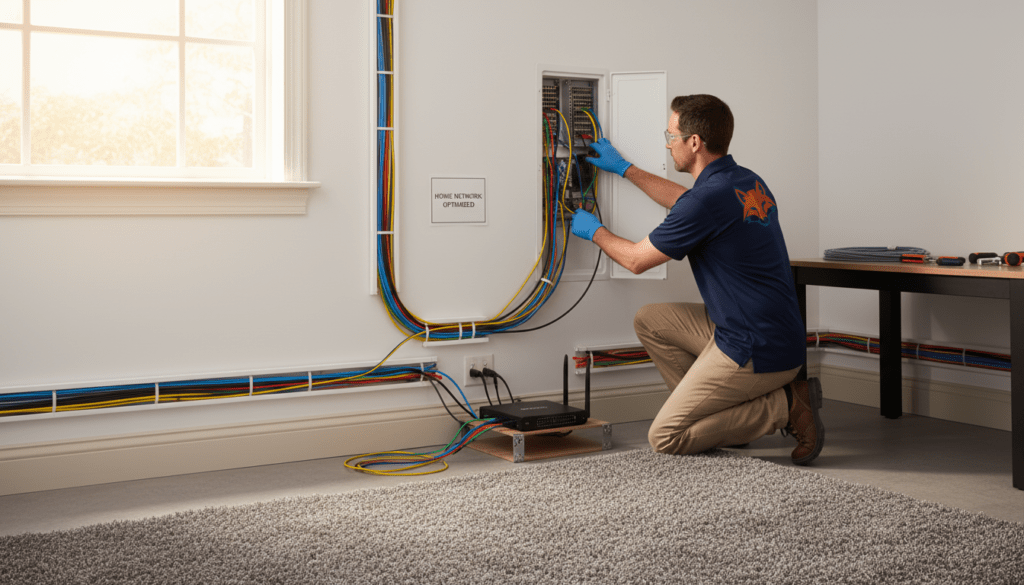
Imagine replacing a tangled mess behind your entertainment center with a clean, labeled run to a wall plate. Picture moving a switch to a central closet for even coverage. These small projects reduce interference, shorten problematic cable runs, and improve signal consistency. They also save you money over repeated service calls.
This introduction hooks builders, makers, and homeowners who prefer tools to invoices. Read on for step-by-step cable-run planning, recommended materials, safety notes about routing near electrical and plumbing lines, and simple cable-management techniques that create a faster, more reliable home network. If you like smart, inexpensive DIY that yields immediate improvements, this series is for you.
Cable Runs for Home Networking
Planning is the most important step for effective cable runs. Start by mapping every endpoint and pick a central distribution point such as a closet or utility room. Measure distances along walls, through attics, and down to outlet locations. Remember Ethernet limits: 100 meters (328 feet) per run for copper; keep long runs within that limit or add an intermediate switch.
Select the right cable type:
- Cat 5e: adequate for many home uses and gigabit at typical distances.
- Cat 6: better crosstalk performance and more headroom for higher speeds.
- Cat 6a: recommended when you want stronger future-proofing and longer 10G capability.
- Shielded cables (STP): use near heavy electrical or RF sources; they require proper grounding.
- Unshielded twisted pair (UTP): cost-effective and suitable for most residential installs.
- Flat cables: discreet under carpets or trim but can sacrifice performance and heat dissipation.
Pulling and termination tips:
- Use fish tape or a pull string to protect cable jackets during long runs.
- Avoid sharp bends; maintain a gentle bend radius, especially for Cat 6 and above.
- Do not staple through the cable; use low-pressure cable clips or Velcro straps.
- Use solid-conductor cable for in-wall fixed runs and stranded cable for patch cords.
- Terminate in-wall runs with keystone jacks and wall plates for durability.
- Test each run with a cable tester and record results for your network map.
Effective Cable Management Practices for Home Internet Optimization
Hide and route cables so they are accessible, neat, and safe:
- Baseboard channels: paintable raceways that run along skirting boards for an unobtrusive look.
- Crown molding channels: discreet for high routes and rooms where appearance matters.
- Cable raceways: surface-mounted trunking that allows easy changes and adds protection.
- In-wall wiring: use rated in-wall cable, install low-voltage mounting brackets, and follow local building codes.
- Under-carpet or behind cabinetry: OK for short, low-heat runs; avoid heavy foot-traffic areas.
Organization and labeling:
- Label both ends with a consistent scheme and maintain a written port map for the distribution panel.
- Use Velcro straps, cable sleeves, and cable management boxes to group and conceal slack.
- Install a small patch panel or rack-mounted switch in the distribution closet to centralize connections.
- Leave a 6–12 inch service loop at each endpoint to allow movement and retermination.
Quick do/don’t list:
- Do cross power and data cables at 90 degrees to reduce electromagnetic interference.
- Do ground shielded runs correctly when you choose STP or F/UTP cable types.
- Don’t run data cables parallel to mains wiring for long distances.
- Don’t overtighten ties or exceed the cable’s bend radius.
These cable-run and management practices reduce interference, simplify troubleshooting, and help maintain consistent bandwidth and reliability across your home network.
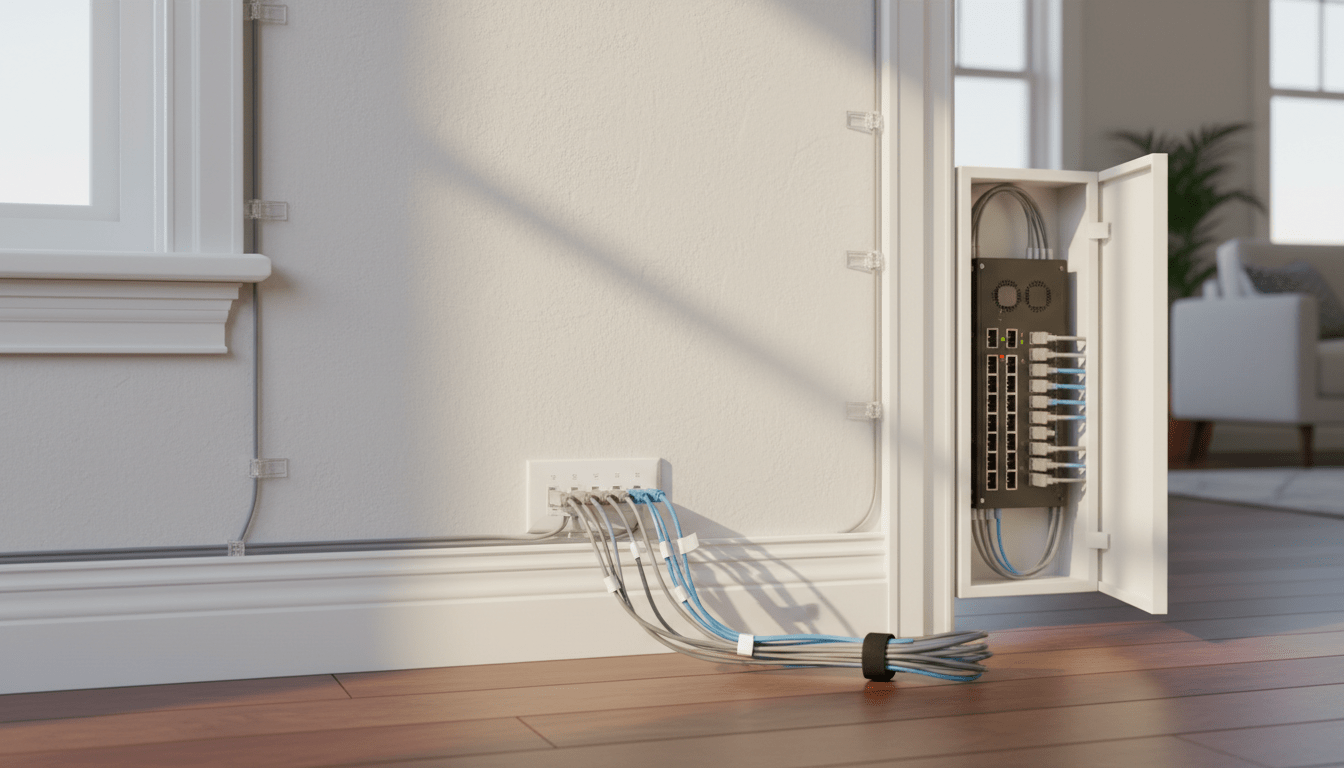
A clean, modern living room scene showing a white paint-matched cable raceway running along the baseboard with multiple Ethernet cables inside. Close-up shows labeled patch cables connected to a white wall plate with a keystone jack. Cable clips secure the cables along trim. A nearby small network cabinet displays a compact switch and a neatly organized patch panel with Velcro-bundled cables. The image emphasizes neat routing, labeling, and use of cable management tools in a typical home environment.
Choosing Ethernet Switches for Home Internet Optimization
An Ethernet switch centralizes wired devices and reduces congestion on Wi‑Fi. Choosing the right switch improves bandwidth speed, lowers latency, and makes the network easier to manage.
Key factors to consider:
- Number of ports: count current devices and add spare ports for growth. Typical home switches are 5, 8, or 16 ports.
- Speed ratings: choose gigabit (1Gb) ports as a minimum. Consider 2.5G, 5G, or 10G on uplinks or for NAS and gaming setups.
- Managed vs unmanaged:
- Unmanaged: plug-and-play, low cost, suitable for simple networks.
- Managed: supports VLANs, QoS, port mirroring, link aggregation, and remote configuration.
- Smart (managed-lite): offers basic VLANs and QoS without full enterprise complexity.
- PoE (Power over Ethernet): useful for access points, VoIP phones, and cameras. Verify power budget and PoE standard (802.3af/at/bt).
- Fanless vs active cooling: fanless models run silently but may limit throughput for heavy loads.
- Build and reliability: metal enclosure, surge protection, and reputable warranty matter for long-term stability.
How Switches Affect Bandwidth and Stability
Switches operate at Layer 2 and forward frames between ports. That role directly affects throughput and latency.
- Bottleneck potential: a single low-speed uplink can throttle many devices. Use a higher-speed uplink or link aggregation.
- Full duplex: modern switches support full duplex and reduce collisions versus hub-style devices.
- QoS: managed switches can prioritize gaming, streaming, and video-conferencing traffic.
- Buffering and latency: cheap switches may have small buffers, causing packet loss under load. Higher-quality switches handle bursts better.
- Segmentation: VLANs isolate traffic, reducing broadcast domains and improving perceived performance for critical devices.
Setting Up Your Ethernet Switch: Placement and Wiring Tips
- Central location: place the switch near the network distribution point or patch panel for shorter runs.
- Minimize uplink runs: keep the router-to-switch uplink on the fastest available port.
- Use the right cables: Cat 6 for most gigabit runs; Cat 6a or better for 10G links. Use solid-core for in-wall runs and stranded for patch cables.
- Avoid daisy-chaining: chain fewer switches and prefer a star topology from a central switch.
- Power and cooling: allow ventilation clearance and avoid enclosed hot spaces.
- Mounting and security: rack-mount in a closet or use a wall bracket. Lockable enclosures help protect equipment and cables.
- Test and document: label ports, test each run with a cable tester, and add the switch to your network map.
Practical examples:
- Small home: 8-port unmanaged gigabit switch works for desktops and consoles.
- Home office with NAS: 8–16 ports with a 2.5G/10G uplink improves file transfers.
- Smart home with many PoE devices: choose a PoE switch sized to the total wattage needed.
Choosing and placing the right switch is a high-impact step in Home Internet Optimization. It reduces bottlenecks, improves reliability, and makes future upgrades painless.
Ethernet Cable Comparison Table for Home Internet Optimization
| Cable type | Typical max speed (typical / realistic) | Shielding | Flexibility | Best use cases | Approx. cost (per 100 ft) |
|---|---|---|---|---|---|
| Cat 5e | Up to 1 Gbps (100 m) | Usually UTP (unshielded) | Very flexible, easy to run | General home internet, streaming, basic gigabit needs | Low ($10–$20) |
| Cat 6 | Up to 1 Gbps (100 m); 10 Gbps up to ~55 m | UTP or available shielded variants | Moderately stiff (larger diameter) | Gigabit networks, short 10G links, gaming, NAS | Mid ($15–$30) |
| Shielded cables (STP / FTP) | Matches category (Cat5e/Cat6/Cat6a) — better in noisy environments | Yes — foil/braid around pairs or overall | Less flexible; requires careful grounding | Runs near heavy electrical/ RF sources, industrial or dense cable bundles | Higher (varies by category, +10–40%) |
| Unshielded twisted pair (UTP) | Matches category (commonly Cat5e/Cat6) | No | Most flexible and affordable | Standard residential in-wall wiring and patch cords | Low to mid ($10–$30) |
| Flat cables | Often Cat5e/Cat6 variants (performance can vary) | Usually unshielded | Extremely flexible and thin; can be fragile | Discreet under-carpet or behind trim for short runs | Low ($10–$25) |
Use this table to balance budget, future speed needs, and the physical routing environment. For Home Internet Optimization, prefer Cat 6 (or shielded variants where interference is likely) for a good balance of performance and cost. Always use in-wall–rated cable for concealed wiring and test each run after installation.
Conclusion
Careful planning and hands-on work are the foundation of Home Internet Optimization. A thoughtful cable-run plan, correct cable choices, and a well-placed Ethernet switch reduce bottlenecks and cut troubleshooting time.
Good cable management does more than tidy a room. Neat routing, labeled runs, and proper termination lower interference. They maintain consistent bandwidth and improve reliability for streaming, gaming, and remote work.
Selecting the right switch and wiring strategy extends network life. Centralized distribution and sensible topology simplify upgrades. These changes often deliver noticeable speed and stability gains without replacing your service.
Tackling these projects yourself saves money and builds useful skills. Start small: run one managed endpoint or tidy a single closet. Test each change, document results, and expand incrementally.
LeisureQuest exists to inspire quality leisure time by helping people explore, play, and learn through practical DIY and tech projects. For more guides and tools that make hands-on Home Internet Optimization approachable, visit LeisureQuest.
Frequently Asked Questions (FAQs)
Which Ethernet cable is best for typical home Internet Optimization?
For most homes, Cat 6 provides the best balance of performance, cost, and future headroom. Cat 5e still handles gigabit tasks and is budget friendly. Choose shielded cable only if you expect electromagnetic interference or run cables near heavy electrical equipment. For concealed wiring, use in-wall–rated cable and test each run after installation.
What are safe and attractive ways to hide cables without hurting performance?
Paintable raceways along baseboards, crown-molding channels, and in-wall runs yield clean results. Under-carpet or behind cabinetry can work for short, low-heat runs but avoid high-traffic areas. Always maintain gentle bend radii and leave service loops at endpoints. Follow building codes for in-wall wiring and use keystone jacks and wall plates for durable terminations.
Should I buy a managed switch for my home network?
It depends on needs. Choose unmanaged switches for plug-and-play simplicity. Opt for managed, or smart switches if you require VLANs, QoS prioritization, link aggregation, or remote diagnostics. For PoE devices, confirm the switch’s power budget. Many homes start with an unmanaged gigabit switch and upgrade to managed hardware when segmentation or traffic control is needed.
Will adding an Ethernet switch increase my internet speed?
A switch cannot raise your ISP’s plan speed. It can, however, remove local bottlenecks. A properly placed gigabit or multi-gig uplink reduces internal contention and yields faster transfers between local devices (NAS, consoles, PCs). Use higher-speed uplinks or link aggregation to prevent the switch from becoming the limiting factor.
How do I avoid interference when routing cables near power lines or appliances?
Keep data and power runs separated. Cross power cables at 90 degrees if needed. Use shielded cable with correct grounding near noisy equipment. Avoid running data in parallel with mains wiring for long distances. Label runs and document routes so future changes don’t unintentionally create interference.